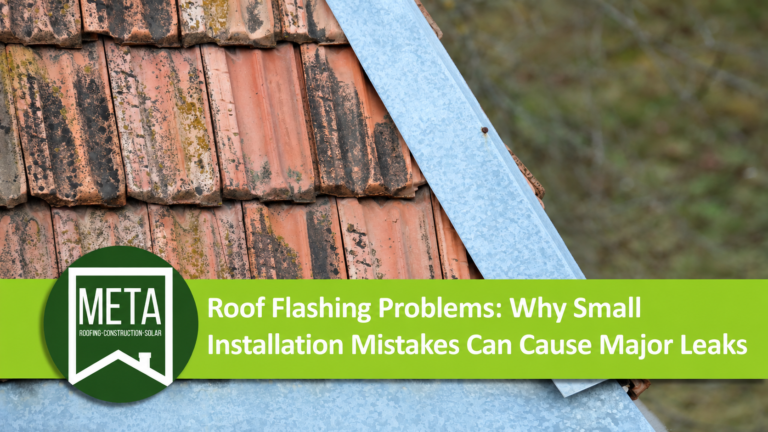
When homeowners think about roof damage, they often picture missing shingles, cracked tiles, or large sections of roofing materials that need replacement. However, some of the most serious roof leaks begin in much smaller areas that are easy to overlook. One of the most common sources of these problems is damaged or improperly installed roof flashing.
Roof flashing plays an essential role in protecting the areas where roofing materials meet chimneys, walls, vents, skylights, and other structural features. Although these components may seem insignificant compared to the rest of the roof, even a small installation mistake can create an opening that allows rainwater to enter the building.
For homeowners in El Paso, Texas, where strong winds, intense sunlight, and seasonal storms can place stress on roofing systems, properly installed flashing is especially important. A small gap around a roof penetration or an incorrectly positioned flashing component may remain unnoticed for months before causing interior water stains, damaged insulation, or expensive repairs.
Understanding how roof flashing works, recognizing common installation mistakes, and knowing when to schedule professional roof flashing repair can help homeowners prevent water damage and protect the long-term performance of their roofing systems.
What Is Roof Flashing and Why Is It Important?
Roof flashing is a protective component, commonly made from metal or other weather-resistant materials, installed around vulnerable areas of a roofing system. Its primary purpose is to direct water away from joints, transitions, and openings where different building materials connect.
While shingles, tiles, and roofing membranes protect the main roof surface, flashing helps maintain waterproofing continuity around areas that would otherwise be more susceptible to water intrusion.
For example, where a roof meets a vertical wall, flashing is installed to help prevent water from entering the connection between the roofing materials and the building structure. Similar protection is required around chimneys, skylights, plumbing vents, and other roof penetrations.
A properly designed flashing system works with the surrounding roofing materials to guide water downward and away from vulnerable openings. Instead of relying exclusively on sealants, effective flashing installation uses appropriate overlaps, positioning, and waterproofing details to manage water movement.
When flashing is missing, damaged, or incorrectly installed, rainwater may travel beneath roofing materials and eventually reach the roof decking, insulation, or interior ceiling.
Why Small Roof Flashing Mistakes Can Lead to Major Water Damage
One of the reasons roof flashing problems are so concerning is that water intrusion may begin long before homeowners notice visible symptoms.
A small opening around flashing can allow moisture to enter during rainfall, particularly when strong winds push water toward roof connections. Once inside, water may travel along decking, framing, or other concealed building components before appearing as a stain on an interior ceiling.
This movement can make the original source of the leak difficult to identify. Homeowners may assume that the problem is directly above the visible water stain, even though the actual flashing defect is located several feet away.
Repeated moisture exposure can gradually affect insulation, wooden components, drywall, and other materials. In some cases, the initial flashing problem may be relatively small, but the resulting damage can extend across a much larger area.
For this reason, roof flashing repair should focus on identifying and correcting the underlying installation or material problem rather than simply covering the visible leak.
7 Common Roof Flashing Installation Mistakes That Cause Leaks
Roof flashing failures can occur because of improper installation, unsuitable materials, aging components, or damage from environmental conditions. Although the exact cause varies depending on the roofing system, several mistakes are frequently associated with water intrusion.
1. Incorrectly Overlapping Flashing Components
Roof flashing must be positioned so that water flows over the protective materials rather than beneath them. When flashing components overlap incorrectly, rainwater may follow an unintended path into the roofing assembly.
This problem can occur around roof-to-wall connections, chimneys, and other areas where multiple flashing pieces must work together.
For example, step flashing installed along a sidewall must be integrated correctly with the roofing materials and adjacent wall assembly. If the pieces are positioned improperly, water can reach vulnerable areas beneath the roof covering.
Incorrect overlaps may not cause an immediate leak during light rainfall. However, prolonged storms or wind-driven rain can expose the weakness and allow moisture to enter the building.
Correcting the issue may require removing surrounding roofing materials and reinstalling the flashing according to appropriate manufacturer instructions and roofing practices.
2. Relying Too Much on Roofing Sealant
Roofing sealants are useful components in certain waterproofing applications, but they should not replace properly designed flashing systems.
One common mistake is attempting to prevent water intrusion by applying excessive sealant around roof penetrations, chimney connections, or damaged flashing.
Although sealant may temporarily reduce water entry, prolonged exposure to sunlight and temperature changes can cause some products to deteriorate or lose adhesion over time.
In El Paso, where roofing materials experience intense ultraviolet exposure and significant temperature fluctuations, relying on exposed sealant as the primary water barrier can be particularly problematic.
A properly installed flashing system should direct water away from vulnerable connections using suitable materials and installation methods. Sealants should be used only where appropriate for the specific roofing assembly.
3. Installing Flashing With Improper Fastening Methods
Flashing components must be secured according to the requirements of the roofing system. Improper fastening can create openings, restrict necessary material movement, or allow components to loosen during strong winds.
For example, placing fasteners in locations exposed to direct water flow may increase the risk of leaks if the penetrations are not properly protected.
Fastening methods also vary depending on whether the roof uses asphalt shingles, metal roofing, tile, or a low-slope membrane system.
Some flashing assemblies must accommodate thermal expansion and contraction, particularly where metal components are exposed to changing temperatures.
An experienced roofing contractor should understand how the selected flashing materials interact with the surrounding roofing system and use installation methods appropriate for the application.
4. Using the Wrong Flashing Materials
Not all flashing materials are suitable for every roofing application. Material selection depends on the roof type, surrounding building components, exposure conditions, and manufacturer requirements.
Common flashing materials include galvanized steel, aluminum, copper, and specialized manufactured components. Each has different characteristics related to durability, corrosion resistance, and compatibility.
Using incompatible metals or materials can contribute to corrosion or premature deterioration under certain conditions. Similarly, flashing that is too thin, improperly shaped, or unsuitable for the roof design may not provide reliable long-term protection.
For homeowners replacing a roof in El Paso, it is important to verify that the contractor selects flashing materials appropriate for the roofing system and the property’s environmental conditions.
5. Improper Flashing Around Roof Vents and Pipes
Plumbing vents, exhaust openings, and other rooftop penetrations require properly installed flashing to prevent rainwater from entering around the openings.
Many residential roofing systems use manufactured pipe flashing components that create a protective seal around vent pipes while integrating with the surrounding roof covering.
Over time, certain rubber or flexible components may crack, shrink, or deteriorate due to environmental exposure. However, leaks can also develop when the flashing was installed incorrectly from the beginning.
For example, a pipe flashing assembly positioned improperly beneath shingles may allow water to enter through the upper edge. Similarly, an incorrectly sized component may fail to create an adequate seal around the pipe.
Because these problems often develop in relatively small areas, they may remain unnoticed until water stains appear inside the home.
6. Failing to Install Proper Chimney Flashing
Chimneys create complex roof connections because they interrupt the normal flow of water across the roofing surface.
A properly detailed chimney flashing system may include step flashing, counterflashing, apron flashing, and additional components depending on the chimney’s design and position.
Each element serves a specific purpose in directing water away from the connection between the chimney and roof.
When these components are missing, incorrectly positioned, or poorly integrated with the masonry, water can enter through gaps around the chimney.
One common problem occurs when contractors attempt to seal the chimney-to-roof connection without installing appropriate flashing components. Although this may provide temporary protection, it does not necessarily create a durable waterproofing system.
Professional chimney flashing repair may require carefully removing damaged components and rebuilding the connection to restore proper water management.
7. Reusing Damaged Flashing During Roof Replacement
During a roof replacement project, some existing flashing components may appear reusable. However, their condition and compatibility should be carefully evaluated before installing new roofing materials.
Reusing flashing that is corroded, bent, improperly sized, or previously damaged can create vulnerabilities in an otherwise new roofing system.
Even when the new shingles or roofing membranes are installed correctly, deteriorated flashing may continue allowing water intrusion at roof transitions and penetrations.
Homeowners should ask their roofing contractor whether existing flashing will be replaced or reused and how its condition will be assessed.
The goal of a professional roof replacement is to create a complete roofing system in which all protective components function together, not simply install new surface materials over existing weaknesses.
The Most Common Areas Where Roof Flashing Leaks Occur
Some sections of a roof are more vulnerable to flashing problems because they involve changes in slope, connections between different materials, or penetrations through the roofing surface.
Understanding these locations can help homeowners recognize where potential water intrusion may originate.
Chimneys and Masonry Connections
Chimneys are common locations for roof leaks because their vertical surfaces require carefully integrated flashing systems.
As roofing materials and masonry components respond to temperature changes, movement may affect deteriorated or improperly installed connections.
Water intrusion around a chimney may become visible as ceiling stains, damp attic materials, or moisture along interior walls near the fireplace.
However, chimney-related leaks may also originate from damaged masonry, chimney caps, or other components, making proper diagnosis essential.
Skylights
Skylights introduce additional joints and transitions into the roofing assembly. When skylight flashing is improperly installed or damaged, rainwater may enter around the frame and reach the surrounding ceiling.
Some skylight leaks originate from flashing defects, while others involve the skylight unit itself, condensation, or deteriorated seals.
A roofing professional should determine the actual source before recommending flashing repair or skylight replacement.
Roof Valleys
Roof valleys are areas where two sloping roof sections meet, concentrating rainwater runoff into a relatively narrow path.
Because valleys carry substantial amounts of water during rainfall, proper waterproofing details are especially important.
Depending on the roofing system, valleys may use metal flashing, specialized membranes, or other approved installation methods.
Incorrect material overlaps, damaged valley components, or debris accumulation can contribute to leaks in these areas.
Roof-to-Wall Connections
Roof-to-wall transitions occur where the roofing surface meets a vertical exterior wall, dormer, or other building feature.
These connections often use step flashing, counterflashing, or other specialized components designed to direct water away from the joint.
When flashing is missing or improperly integrated with the wall’s weather-resistant barrier, water may enter behind the exterior materials and travel into the roofing assembly.
Plumbing Vents and Exhaust Pipes
Vent pipes and exhaust openings require protective flashing because they pass directly through the roof surface.
Cracked vent boots, deteriorated seals, and incorrectly installed flashing can allow moisture to enter around these penetrations.
Although the affected area may be small, water can travel along the pipe or surrounding framing before becoming visible inside the home.
How El Paso’s Climate Can Affect Roof Flashing
El Paso’s desert climate creates environmental conditions that can influence the performance of roofing materials and flashing components.
Intense sunlight, high temperatures, strong winds, and occasional heavy rainfall can expose existing installation problems and contribute to material deterioration.
Extreme Heat and Temperature Changes
Roofing materials experience temperature fluctuations throughout the day and across different seasons. Metal flashing expands and contracts as temperatures change, while surrounding roofing materials may respond differently.
Proper installation must account for expected material movement. When flashing is excessively restrained or incompatible with adjacent components, thermal movement can contribute to stress at connections.
Over time, these conditions may affect fasteners, sealants, and other parts of the flashing assembly.
Strong Winds and Dust Storms
Seasonal winds are a familiar part of life in El Paso. Strong gusts can place pressure on roof edges, flashing components, and other exposed roofing details.
If flashing was not secured properly or has already deteriorated, wind exposure may loosen components or reveal existing weaknesses.
Wind-driven rain can also reach connections that remain relatively protected during calm weather, causing leaks that only appear during certain storms.
Sudden Heavy Rainfall
Although El Paso receives relatively limited annual rainfall, summer storms can produce intense rain over short periods.
These conditions test the performance of roof valleys, flashing connections, and drainage systems.
A small opening that remains unnoticed during dry weather may allow water to enter quickly when substantial runoff reaches the affected area.
For this reason, professional inspections before and after significant storm events can help identify roof flashing problems before they lead to extensive interior damage.
Warning Signs That Your Roof Flashing May Be Damaged
Roof flashing problems are not always obvious from the ground, but certain symptoms may indicate that a professional inspection is necessary.
One of the most common warning signs is a recurring water stain near a chimney, skylight, exterior wall, or ceiling penetration. These stains may expand after rainfall or reappear even after temporary repairs.
Homeowners may also notice peeling paint, damp drywall, musty odors, or moisture inside accessible attic areas. On the exterior, visible flashing damage may include loose metal edges, corrosion, missing components, or gaps around roof connections.
Additional warning signs include:
- Water stains that develop near roof-to-wall connections.
- Leaks that occur primarily during wind-driven rain.
- Visible cracks or deterioration around vent pipe flashing.
- Loose or displaced flashing near chimneys.
- Repeated leaks after previous sealant repairs.
- Moisture around skylight frames or adjacent ceilings.
- Signs of water intrusion following severe storms.
These symptoms do not always confirm a flashing defect because other roofing or building problems can produce similar conditions. A professional roof inspection is the most reliable way to identify the actual source of water intrusion.
Can Roof Flashing Problems Cause Hidden Structural Damage?
When flashing fails, water may enter concealed sections of the roofing assembly before any visible interior damage appears.
Moisture can travel along roof decking, framing, insulation, and other building components. If the problem continues, certain materials may deteriorate or lose their intended performance characteristics.
Wooden decking and structural members exposed to repeated moisture may develop decay, while wet insulation may become less effective at controlling heat transfer. Interior drywall and ceiling finishes may also become damaged.
Persistent moisture can contribute to mold growth when suitable conditions are present.
The extent of damage depends on how frequently water enters, how much moisture accumulates, and how long affected materials remain wet.
Addressing flashing problems promptly can help limit additional deterioration and reduce the likelihood of more extensive repairs.
How Professional Roof Flashing Repair Works
Repairing damaged flashing requires identifying the source of water intrusion and selecting a solution appropriate for the roofing system.
The process varies depending on the location and condition of the affected components, but a professional evaluation should address the underlying problem rather than relying exclusively on temporary surface treatments.
Step 1: Inspect the Roofing System
A roofing contractor begins by examining the areas where leaks are suspected, including chimneys, vents, roof valleys, skylights, and wall connections.
The inspection may also involve evaluating surrounding roofing materials and accessible attic spaces to determine how water is entering and traveling through the structure.
Because interior water stains do not always appear directly below the source, a thorough assessment is essential.
Step 2: Identify the Damaged or Incorrectly Installed Components
Once the suspected entry point has been located, the contractor evaluates the flashing’s condition and installation.
Problems may include incorrect overlaps, loose fasteners, corroded metal, deteriorated vent boots, damaged sealants, or missing waterproofing components.
Identifying the specific defect helps determine whether localized repair is sufficient or whether part of the flashing assembly needs to be replaced.
Step 3: Remove or Correct Damaged Materials
Depending on the problem, professional roof flashing repair may require removing nearby shingles, tiles, or other roofing materials to access the affected connection.
Damaged flashing components may then be repaired or replaced using suitable materials and methods.
For example, correcting improperly installed step flashing may involve reinstalling individual flashing pieces so they integrate correctly with the roof covering and adjacent wall assembly.
Step 4: Restore Waterproofing Connections
After replacing or adjusting the flashing, the contractor ensures that the surrounding roofing components are properly integrated.
The completed assembly should direct water away from vulnerable joints and toward the intended drainage path.
Any sealants used must be compatible with the selected materials and appropriate for the roofing application.
Step 5: Inspect the Completed Repair
Once the work is finished, the contractor should evaluate the repaired area for visible installation problems and verify that the components are properly positioned and secured.
Depending on the roofing system and circumstances, additional testing may be appropriate.
Homeowners should continue monitoring previously affected areas during subsequent rainfall and contact the contractor if signs of moisture return.
Can You Fix Roof Flashing With Sealant Alone?
Applying roofing sealant may appear to be a simple solution when water enters around a chimney, vent, or other roof penetration. However, sealant alone is not always sufficient to correct the underlying problem.
If flashing is incorrectly positioned, missing, or physically damaged, applying additional sealant may temporarily cover an opening without restoring the proper flow of water across the roof.
Over time, the sealant may deteriorate or separate from surrounding materials, allowing the leak to return.
Some roofing systems incorporate sealants as part of an approved flashing detail, so their use is not inherently incorrect. The important distinction is whether the repair follows appropriate installation methods and addresses the actual cause of the leak.
Homeowners should avoid attempting to repair flashing from the roof themselves, particularly when the surface is steep, wet, damaged, or difficult to access.
Professional evaluation can help determine whether a minor repair is appropriate or whether more extensive flashing replacement is necessary.
Should Roof Flashing Be Replaced During a Roof Replacement?
A complete roof replacement provides an opportunity to evaluate flashing components that may have been difficult to inspect while the existing roofing materials were in place.
In many cases, replacing deteriorated or improperly installed flashing is an important part of restoring the roofing system’s waterproofing performance.
However, not every existing flashing component necessarily requires replacement. Some components may be suitable for reuse if they remain in good condition, are compatible with the new roofing system, and meet applicable installation requirements.
The decision should be based on a professional assessment rather than cost savings alone.
Homeowners should ask whether the roof replacement estimate includes new flashing around chimneys, vents, valleys, and roof-to-wall connections. They should also clarify how concealed damage or additional flashing repairs will be handled if problems are discovered during installation.
Installing new roofing materials without addressing existing flashing deficiencies can allow leaks to continue even after the roof has been replaced.
How to Prevent Roof Flashing Problems
Preventing flashing problems begins with proper installation and continues through routine roof maintenance.
Because flashing protects some of the most vulnerable areas of a roofing system, periodic inspections can help identify deterioration before water intrusion becomes extensive.
Homeowners should consider scheduling professional roof evaluations after significant storms, particularly when strong winds may have affected exposed components.
It is also important to inspect flashing when rooftop equipment is installed, modified, or removed. Work involving solar panels, ventilation systems, satellite dishes, or other roof penetrations should preserve the waterproofing integrity of the existing roofing assembly.
If a leak develops near a chimney, skylight, or vent, addressing the issue promptly can help prevent additional damage.
For El Paso homeowners, preventive maintenance before the summer monsoon season may be especially useful because long dry periods can conceal roofing problems until heavy rainfall occurs.
When Should You Call a Roofing Contractor for Flashing Problems?
Homeowners should contact a professional roofing contractor when they notice recurring leaks, damaged flashing, water stains near roof penetrations, or visible deterioration around roofing connections.
Even small leaks deserve attention because the resulting moisture may affect concealed materials long before interior damage becomes obvious.
A professional contractor can examine the condition of the flashing, determine whether the problem is related to installation or deterioration, and recommend an appropriate repair.
If the roof is older or multiple flashing components are failing, the contractor may also evaluate whether localized repairs remain practical or whether broader roofing improvements should be considered.
Taking action early can help protect the roofing system and reduce the risk of additional water damage.
Why Professional Roof Flashing Installation Matters in El Paso, Texas
Roof flashing is a relatively small component of a roofing system, but its installation requires careful attention to material compatibility, water movement, fastening methods, and surrounding construction details.
Improper flashing installation can compromise the performance of otherwise high-quality roofing materials, creating leaks that may become expensive to diagnose and repair.
El Paso’s intense sunlight, temperature fluctuations, seasonal winds, and sudden rainfall make these details particularly important.
Working with an experienced roofing contractor helps ensure that flashing components are selected and installed according to the requirements of the roofing system.
Whether you’re repairing an existing leak or planning a complete roof replacement, properly installed flashing is essential for maintaining reliable protection against water intrusion.
Protect Your Home From Roof Leaks With META Roofing in El Paso, TX
Small flashing problems can lead to significant roofing damage when left unaddressed. From deteriorated vent boots to improperly installed chimney flashing, vulnerable roof connections can allow water to enter and affect materials throughout your home.
At META Roofing, we understand the challenges that El Paso’s climate presents for residential roofing systems. Our team helps homeowners identify roofing problems, evaluate damaged materials, and explore solutions for roof repairs and replacements.
Whether you’re dealing with recurring leaks, damaged flashing, or concerns about the condition of your existing roof, professional evaluation can help determine the underlying cause and identify the appropriate next steps.
Contact META Roofing today to learn more about our residential roofing services and schedule a professional roof evaluation in El Paso, Texas.
Frequently Asked Questions About Roof Flashing Problems
What Is the Most Common Cause of Roof Flashing Leaks?
Roof flashing leaks can result from improper installation, deteriorated materials, damaged sealants, loose fasteners, or incorrect integration with surrounding roofing components. One common problem occurs when flashing is positioned incorrectly, allowing water to travel beneath the roof covering instead of flowing away from vulnerable connections. A professional inspection can help determine the exact cause.
How Do I Know if My Roof Flashing Is Damaged?
Common warning signs include water stains near chimneys, skylights, vents, or exterior walls, as well as visible corrosion, loose flashing, and gaps around roof connections. However, flashing damage may not always be visible from the ground, and some symptoms can have other causes. A roofing professional can inspect the affected areas and identify potential water entry points.
Can Roof Flashing Be Repaired Without Replacing the Entire Roof?
Yes. Many flashing problems can be corrected through localized repairs or replacement of damaged components. The appropriate solution depends on the flashing’s condition, the surrounding roofing materials, and whether water intrusion has damaged underlying components. A complete roof replacement is not automatically necessary when a flashing leak is discovered.
How Long Does Roof Flashing Last?
The lifespan of roof flashing depends on the material, installation quality, environmental exposure, and maintenance. Properly installed metal flashing may remain functional for many years, while some flexible components and sealants may require earlier replacement. Regular inspections can help identify deterioration before it causes leaks.
Can Improper Roof Flashing Cause Leaks During Heavy Rain?
Yes. Incorrectly installed flashing may allow water to enter around chimneys, walls, vents, and other roof connections. Some leaks become noticeable only during heavy rainfall or when strong winds push rainwater toward vulnerable openings. These conditions can expose defects that remain unnoticed during lighter storms.
Is Roof Flashing Included in a Roof Replacement?
Roof flashing is an essential part of many roofing systems, but the extent of flashing replacement depends on the contractor’s estimate and project requirements. Some existing components may be reused if they are in suitable condition and compatible with the new installation. Homeowners should verify which flashing components are included in the written scope of work before approving a roof replacement.
Can I Use Roofing Caulk to Stop a Flashing Leak?
Roofing sealants may be appropriate for certain approved applications, but they are not always sufficient to repair damaged or improperly installed flashing. Applying sealant over an existing problem may temporarily reduce water intrusion without correcting the underlying defect. Professional flashing repair is recommended when the source of the leak is uncertain.
Does Homeowners Insurance Cover Roof Flashing Damage?
Homeowners insurance may cover certain flashing damage when it results from a covered event, such as qualifying storm damage. However, policies commonly exclude problems caused by normal deterioration, neglected maintenance, or faulty installation. Coverage depends on the policy terms, exclusions, deductibles, and circumstances of the damage.
Can Damaged Roof Flashing Cause Mold?
Yes. When damaged flashing allows moisture to enter a roof or wall assembly, persistent dampness can create conditions that support mold growth. The risk depends on the amount of moisture, affected materials, and how long the area remains wet. Repairing the source of water intrusion and addressing moisture-damaged materials promptly can help prevent additional problems.
How Often Should Roof Flashing Be Inspected?
Roof flashing should be evaluated as part of routine professional roof maintenance and after significant weather events when damage is suspected. Inspection frequency depends on the roof’s age, materials, condition, and warranty requirements. For homes in El Paso, checking vulnerable flashing connections before or after periods of strong winds and seasonal storms can help identify problems early.